

recover auto
The Ultimate Guide to Restoring JDM Legend Seats: Recaro, Bride, and OEM+ Icons
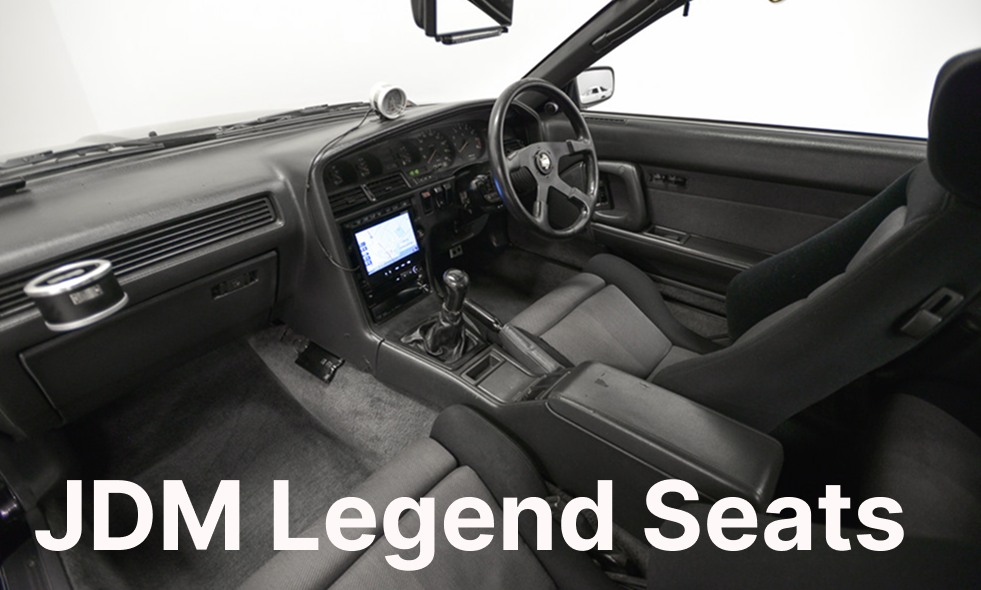
My entire journey into professional upholstery began with a personal quest: the hunt for the iconic Recaro LX-B seats for my Toyota Supra A70 Turbo-R.
These were not your average seats; they were a symbol of a special edition, with unique features like the tilt-adjustment knob located on only one side, a hallmark of the genuine factory-installed units.
The search felt endless. I scoured junkyards and contacted importers for years until a friend finally brought in a parts car from Japan. I bought the pair immediately, but they were mismatched—one was the coveted LX-B, the other an LS model.
This imperfection is what pushed me over the edge. I was determined to make them a perfect set, and that's when I plunged headfirst into the intricate world of Recaro restoration.

2015-2018
The photo on the right is that promise fulfilled. The same car, reborn in its absolute factory specification a "clean look", on pristine period-correct BBS wheels, captured on the race track at our local "Zmeyinka" circuit in Vladivostok.
The three years between these two pictures represent more than just a restoration; they were a transformation that shaped my profession and my understanding of what makes a classic JDM car truly complete.
The three years between these two pictures represent more than just a restoration; they were a transformation that shaped my profession and my understanding of what makes a classic JDM car truly complete.

Recaro LX-S in my home and OEM supras back seat in Monza Gray fabric ideal contition - later LXS is sold to Dagestan. Donor supra parts in Vladivostok after arrival from Japan
Fueled by the vision of transforming my Supra into a full Recaro-spec model, my hunt for any Recaro seats began. This quest opened my eyes to a whole new world. I discovered that these iconic German seats were a prized option across a surprising range of Japanese vehicles.
My searches led me to Recaros in the Toyota Hilux Surf, Isuzu Bighorn, Mitsubishi RVR, and Isuzu Gemini.
My searches led me to Recaros in the Toyota Hilux Surf, Isuzu Bighorn, Mitsubishi RVR, and Isuzu Gemini.

Gray Monza - new and bright
The list seemed to grow every day, a treasure hunt for any JDM enthusiast.his phase was my real education. I started learning restoration piece by piece, practicing on individual components and experimenting with different fabrics. The photo here shows a perfect example of a common issue: the upper bolsters of rear seats, utterly destroyed by sun and UV exposure.
The fabric doesn't just fade; it literally burns out and crumbles. This particular fragment is one I replaced with a fabric from AliExpress as an experiment—a practical lesson in material durability.
The fabric doesn't just fade; it literally burns out and crumbles. This particular fragment is one I replaced with a fabric from AliExpress as an experiment—a practical lesson in material durability.

My experiments with different fabrics taught me a crucial lesson about quality. While the AliExpress fabric visually mimics the original Mosa pattern from a distance, it is entirely synthetic. In contrast, the genuine Recaro material contains a high percentage of wool, giving it a distinct, superior tactile feel.
For the dedicated enthusiast pursuing an authentic restoration, finding the correct fabric is paramount. If you're committed to a period-correct retrim of your classic Recaro seats, I highly recommend exploring a specialized Australian retailer.
This shop is a treasure trove for purists, offering an extensive range of authentic-style fabrics and a comprehensive selection of replacement parts specifically for vintage sports seats. Beyond textiles, they are also an excellent source for original and refurbished classic steering wheels, making them a one-stop shop for completing your cabin's authentic period look.
I suspect its long-term durability will be fundamentally different. However, for a low-wear area like the rear seats of a sports coupe—where passengers are rare—it can be a viable, cost-effective solution. For the high-use front seats, though, I would not recommend it, though the experiment is always worth conducting.
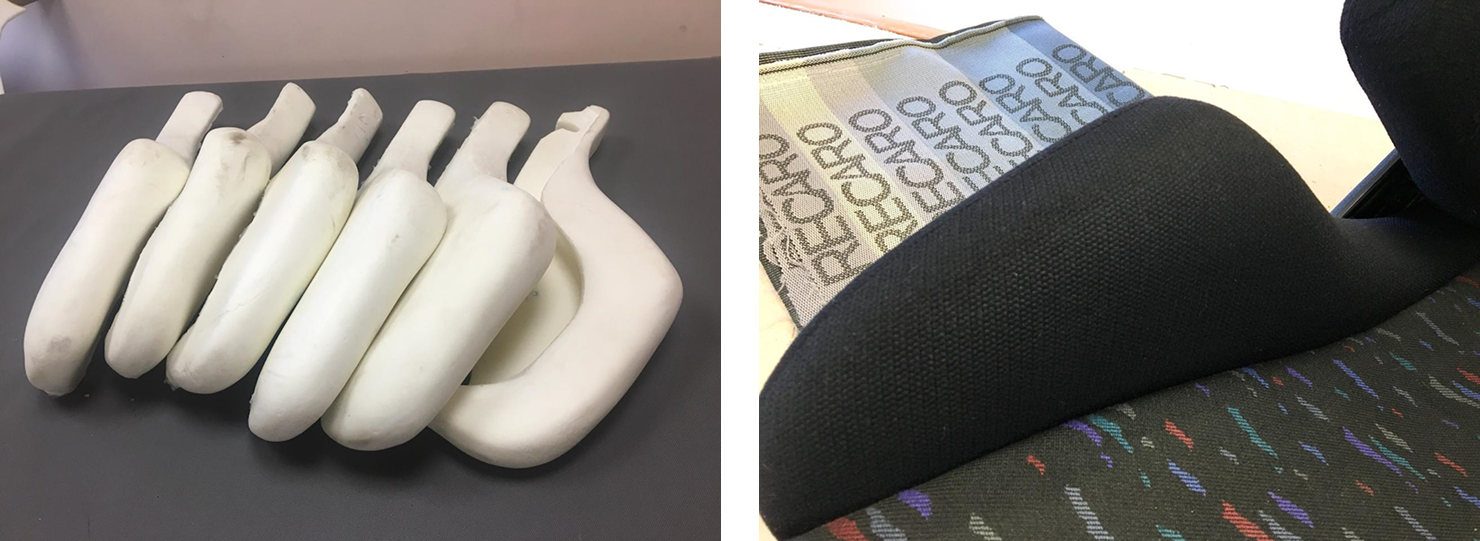
This hands-on learning naturally evolved from repairing fragments to restoring entire seats. Working with various models, I identified a common failure point for owners of the sought-after Recaro SR2 and SR3 series: the lower side bolster.
The very design that provides excellent lateral support during cornering becomes its Achilles' heel during daily entry and exit. The constant pressure and friction cause the foam bolster to crack and collapse. Sourcing a reliable replacement was a game-changer. After testing several options, I found a supplier whose replacement foam pads met my quality standards, allowing me to properly restore both the support and the shape of these iconic seats.
It was this specific solution that marked a turning point for me. Word spread among the local A70 Supra community that there was now someone who could genuinely fix their crumbling Recaros. Owners started reaching out for consultations and services, transforming my personal obsession into a professional calling.
For the dedicated enthusiast pursuing an authentic restoration, finding the correct fabric is paramount. If you're committed to a period-correct retrim of your classic Recaro seats, I highly recommend exploring a specialized Australian retailer.
This shop is a treasure trove for purists, offering an extensive range of authentic-style fabrics and a comprehensive selection of replacement parts specifically for vintage sports seats. Beyond textiles, they are also an excellent source for original and refurbished classic steering wheels, making them a one-stop shop for completing your cabin's authentic period look.
I suspect its long-term durability will be fundamentally different. However, for a low-wear area like the rear seats of a sports coupe—where passengers are rare—it can be a viable, cost-effective solution. For the high-use front seats, though, I would not recommend it, though the experiment is always worth conducting.
This hands-on learning naturally evolved from repairing fragments to restoring entire seats. Working with various models, I identified a common failure point for owners of the sought-after Recaro SR2 and SR3 series: the lower side bolster.
The very design that provides excellent lateral support during cornering becomes its Achilles' heel during daily entry and exit. The constant pressure and friction cause the foam bolster to crack and collapse. Sourcing a reliable replacement was a game-changer. After testing several options, I found a supplier whose replacement foam pads met my quality standards, allowing me to properly restore both the support and the shape of these iconic seats.
It was this specific solution that marked a turning point for me. Word spread among the local A70 Supra community that there was now someone who could genuinely fix their crumbling Recaros. Owners started reaching out for consultations and services, transforming my personal obsession into a professional calling.
DIY Guide: How to Disassemble Your Recaro Seat in 6 Steps
Replacing the worn-out side bolsters is a task any enthusiast can handle—if you can change spark plugs in your engine, you can do this. The key is patience and care. Here is my step-by-step guide to disassembling a classic Recaro seat for servicing.
You will need: A set of screwdrivers (flathead and Phillips), a plastic trim removal tool (or a small flathead wrapped in tape to prevent scratches), and pliers.
You will need: A set of screwdrivers (flathead and Phillips), a plastic trim removal tool (or a small flathead wrapped in tape to prevent scratches), and pliers.
Step 1: Remove the Recline Knob
The process begins with the large recline knob. Pull it straight towards you. It's often easier to first pop out the central circular cap; after that, the main knob should come off with relative ease.
*(**Photo suggestion:** Close-up of the recline knob being removed, showing the central cap separated.)*
*(**Photo suggestion:** Close-up of the recline knob being removed, showing the central cap separated.)*
Step 2: Detach the "Recaro" Plastic Cover
Next, locate the plastic cover on the side of the seat, often stamped with the "Recaro" logo. This cover is held in place by three plastic pins from the inside. Carefully insert a small flathead screwdriver inside the seat's mechanism to press these pins outward. The cover should release with a click.
**Photo suggestion:** The "Recaro" cover being pried off, with an arrow pointing to one of the internal plastic pins.
**Photo suggestion:** The "Recaro" cover being pried off, with an arrow pointing to one of the internal plastic pins.
Step 3: Release the Backrest Lock
With the cover off, you will see the backrest lock mechanism. To release the backrest, you need to push the metal spring-loaded lock pin outward. Use a screwdriver or pliers to carefully shift it sideways until it "pops" out, allowing you to fold the backrest forward.
*(**Photo suggestion:** A clear shot of the metal lock pin being pushed outward with a tool.)*
*(**Photo suggestion:** A clear shot of the metal lock pin being pushed outward with a tool.)*
Step 4: Inspect and Address the Shock Absorber
Now, look at the bottom of the seat frame. You'll see a square shock absorber with two rubber bands. This is a common failure point—these rubber bands often tear. This is the moment to decide if you need to replace it with a new unit or restore the old one by reinforcing it with leather and glue, as mentioned earlier.
*(**Photo suggestion:** The square shock absorber at the base of the seat, preferably one showing a torn rubber band.)*
*(**Photo suggestion:** The square shock absorber at the base of the seat, preferably one showing a torn rubber band.)*
Step 6: Unhook the Seat Cushion Clips
The main seat cushion is held to the metal chassis by strong plastic clips. These need to be unclipped. You can carefully pry them open using a flathead screwdriver, working your way around the cushion until it is free.
*(**Photo suggestion:** A plastic clip being pried away from the metal chassis.)*
*(**Photo suggestion:** A plastic clip being pried away from the metal chassis.)*
Step 7: Don't Forget the Retaining Ring!
Before the cushion can be fully removed, there is one more crucial detail. Do not forget to detach the small metal retaining ring that secures the front of the cushion to the frame. This ring is often overlooked but is essential for a secure fit.
The location of the small metal retaining ring before and after removal
The location of the small metal retaining ring before and after removal
Final Note:
Final Note: The fabric of the side bolsters is often tucked into the chassis. To free it, gently push the fabric inward with a flat screwdriver. Once all these steps are complete, the seat will be fully disassembled, and you can access the foam bolsters for replacement.


The Recaro Philosophy: More Than Just a Seat
What makes Recaro truly special, beyond the bolts and fabric, is its brilliant modular design. It's a product engineered to be serviced.
Disassembling, finding parts, and even swapping components between similar models is remarkably straightforward. While the metal chassis can rust, I've only once encountered a frame that needed serious sandblasting and repainting.
Typically, these seats age gracefully, with the main wear point being the foam bolsters. By replacing them and refreshing the upholstery—whether with the original fabric or premium leather—you can restore a classic piece to its former glory, a practice cherished not only by JDM purists but also by fans of classic BMW, Audi, and Mercedes, all of whom have collaborated with Recaro over the years. This isn't just a car seat; it's a piece of automotive philosophy and culture.

Beyond Restoration: Leather, Alcantara, and International Projects
My journey with Recaro has led to some remarkable projects. While I prefer timeless styles, one of my favorites was retrimming a set in black leather with a "kolbaska"-style perforated central section—it looked absolutely classy. I've also had the pleasure of working with pristine sand-beige Recaro LS seats, which found a new home in a classic Porsche.

Conclusion: The Journey Continues
My journey with Recaro has led to some remarkable projects. While I prefer timeless styles, one of my favorites was retrimming a set in black leather with a central part in "tube style" perforated central section—it looked absolutely classy. I've also had the pleasure of working with pristine sand-beige Recaro LS seats, which found a new home in a classic Porsche.c


Sometimes, it's fun to experiment. Alcantara always adds a sporty touch, and while it looks different on modern seats, a tasteful amount can work wonderfully on a classic. However, some things are best left original. I've attempted to restore the embroidered Recaro logos a couple of times, but the precision required is extreme. Even skilled embroiderers often miss the mark, causing the lettering to shift. My advice is to preserve the original embroidery whenever possible.
The reach of this passion can be global. I even have photos of a box of seats that traveled from Russia to New York and back due to a delivery issue—a testament to the international demand for these icons in the days when such international sales were possible.
The reach of this passion can be global. I even have photos of a box of seats that traveled from Russia to New York and back due to a delivery issue—a testament to the international demand for these icons in the days when such international sales were possible.

If you enjoyed this deep dive into the world of Recaro, stay tuned. This is just the beginning. I will continue to share my knowledge and projects for all who love JDM, old-school aesthetics, and the art of restoring legendary sports cars. Whether it's a full leather retrim, a complex mechanical fix, or sourcing that impossible-to-find part, the mission remains the same: to keep the soul of these automotive legends alive.
Thank you for reading.
Thank you for reading.

old school recaro party place